Belly button piercings may appear totally cool and effortless from an outside perspective, but they actually require serious commitment if you want them to look good in the long run. They heal slower than many other types of body piercings, and they require a significant amount of aftercare.
This guide will take you through the piercing process and show you how to avoid potential problems as you heal. If you follow this advice, you'll be showing off a piercing that is both stylish and healthy in no time!
Feature image: Spookygonk/Flickr, used under CC 2.0
Can You Get a Belly Button Piercing?
Some people are disqualified from getting a belly button piercing.
Typically, belly button piercings go through the “lip” of skin above the belly button. Although most people can technically get these types of piercings, it's best to have a good flap of skin above the belly button for the piercer to put the jewelry through if you want it to heal properly. The piercing also needs room below and behind the flap so that the area doesn’t become irritated in the healing process. If you don’t have a solid flap of skin on the top of the belly button, sometimes piercers can go for the lower lip of the belly button instead (though this is a rare option).
Here’s an example of what a typical belly button piercing looks like:
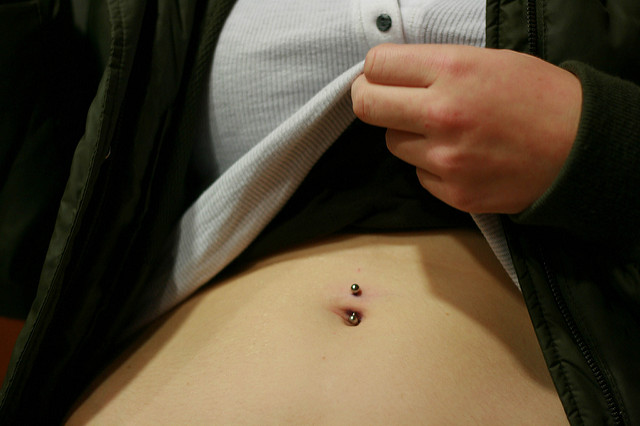
She did it/used under CC by 2.0
Unfortunately, if you have an outie belly button, you most likely won’t be able to get it pierced. Some people believe that outie belly button piercings are the only "true" belly button piercings because they actually involve piercing the inner part of the navel.
However, infections in outie belly button piercings can travel to your internal organs and become extremely dangerous. Most reputable piercers will not take this risk. In case you're unsure of which type of belly button you have going on, here's what an outie looks like:
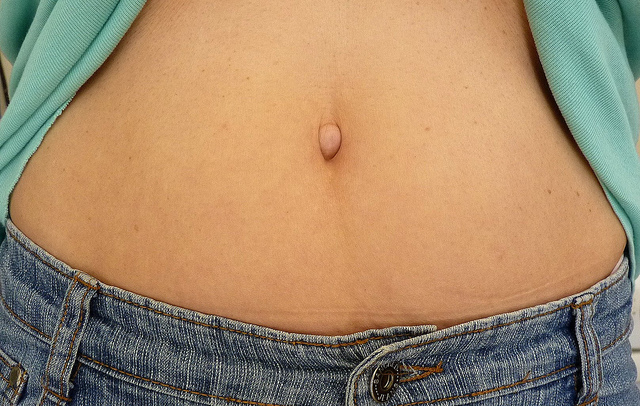
Belly Button-3/used under CC 2.0
The piercer will always examine your belly button carefully before starting the process to see if your anatomical setup will allow for the piercing to heal safely.
What Are the Risks Associated With Belly Button Piercings?
Even if you believe that your belly button is the ideal candidate for a snazzy new piece of jewelry, you should know that some health risks come hand-in-hand with getting this type of body piercing. These risks include:
- Allergic reactions to the jewelry
- Excessive bleeding
- Jewelry rejection or migration (migration is when the piercing moves internally to a slightly different spot, and rejection is when your body starts to push the jewelry out and you see more and more of the barbell)
- Bacterial infections
- Permanent scarring (this can happen if you don’t bother to remove the jewelry after your body has decided to reject it)
You can minimize these risks by finding a reputable piercer and caring for your piercing appropriately during the healing process (discussed in the next couple of sections).
Does a Belly Button Piercing Hurt a Lot?
Good news: most people say that belly button piercings don’t hurt that much. They’re comparable to ear lobe piercings in terms of pain. If you’ve gotten your ear or nose cartilage pierced before, that type of piercing usually hurts more than a belly button piercing. You may experience some soreness and throbbing in the first few days, but it shouldn't interfere with your life significantly.
One downside to belly button piercings is that they do take significantly longer than other piercings to heal. While ear piercings typically heal in 6 to 8 weeks, a belly button piercing is usually not fully healed for six months to a year (which is why many people suggest getting your piercing in the winter so you can show off the fully healed final product come beach season).
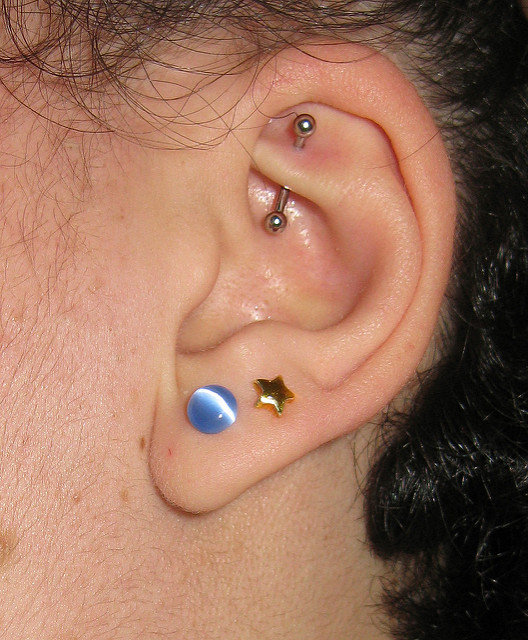
If you've ever gotten this type of piercing on your upper ear, chances are that it hurt a lot more than most belly button piercings. (left ear, used under CC 2.0)
How to Get Your Belly Button Pierced
Here's a rundown of the steps you need to go through to ensure the best piercing experience. Taking the process seriously and finding a reputable piercer can make all the difference in the speed of your healing and satisfaction with your piercing overall.
Step 1: Know the Laws and Regulations
If you’re over 18, make sure you bring an official form of photo ID like a driver’s license or passport. If you’re under 18, you must have a parent or guardian present to sign off on your piercing. This article has a list of piercing regulations for all the different US states if you'd like to verify your state's specific policies.
Piercing places sometimes take these rules further and say they won’t do certain types of piercings on minors or won’t pierce anyone under the age of 16 even with the consent of a parent or guardian. In addition to checking the laws in your state, research the regulations at the specific place where you plan on getting pierced to see if they have any special stipulations.
Step 2: Find a Good Piercing Place
The quality of the piercing place makes a huge difference in the likelihood that your piercing will heal properly. Look for places near you that have good Yelp reviews and appropriate credentials (check to see if the piercer is a member of the Association of Professional Piercers). Most piercing places also have websites where you can check out the portfolios of their piercers and read reviews from other customers.
Avoid going to sketchy booths in the middle of the mall or really any place that doesn’t look like a doctor’s office when you get into the piercing room. The piercing should be done with sterile equipment in a squeaky clean environment to ensure the lowest risk of infection.
Don’t ever let anyone pierce you with a piercing gun! They cause too much trauma to the area and can’t be properly sterilized.

One Day We Will All Die, used under CC 2.0
Step 3: Prepare to Get Pierced
First off, take a shower beforehand. It’s just polite not to be smelly when a stranger has to touch your belly button. Also, make sure you’re fully hydrated and have eaten at least a little something within the hour so you don’t feel woozy during the process.
Above all, do NOT get drunk before you get your belly button pierced. Any piercing place worth its salt will turn away an intoxicated person, both because you don’t have the capacity to make good decisions after drinking and because drinking can cause excessive bleeding at the piercing site. Try to live a healthy, responsible lifestyle at least for the 24 hour period before your piercing.
Step 4: Choose Your Jewelry
The materials that are least likely to irritate the piercing site include surgical stainless steel, surgical titanium, Tygon plastic, and solid 14K gold. You should try to avoid jewelry made of nickel or sterling silver because these metals are the most likely to cause allergic reactions in people with sensitive skin. If you’ve gotten other piercings in the past, be mindful of how your body has reacted.
Also, choose a piece of jewelry that you won’t get tired of seeing. Remember, you won't be able to take it out for another six months to a year. Go with a barbell rather than a ring because there’s less risk of the barbell getting caught on stuff in the healing process.
Belly buttons are typically pierced with 12 gauge jewelry, which is around 2 mm in diameter. This is much larger than the jewelry used in a typical ear piercing, which is 1 mm or less in diameter. It’s better to have a thicker piece of jewelry because it will make the piercing sturdier and more resistant to tearing and migration.
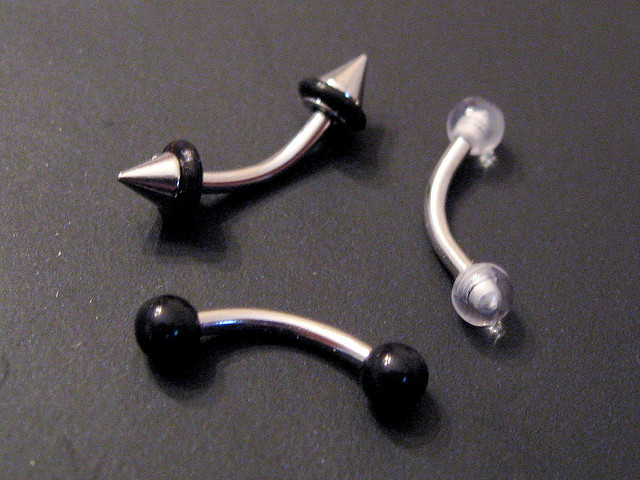
Triforce de Awesome!, used under CC 2.0
Step 5: Pay Your Piercer
Navel piercings can range in cost, but they’re $40-$60 at most piercing places. This includes both the procedure and the cost of the jewelry. If you’re happy with the way things go, it’s considered good form to give your piercer a 10-20% tip on top of the regular price.
That's it! You'll have a brand new navel piercing. Now comes the long and hard part - caring for your new piercing.
Caring for Your Belly Button Piercing
First off, DON’T ever touch or clean the piercing without washing your hands first! If you ignore this rule, you’re asking for an infection. Just leave it alone and let it heal except for when you need to move it around a little bit to clean it. Similarly, you should wear loose clothing that won’t irritate the piercing area in the healing process. Try to sleep on your back and avoid tanning beds at least for the first couple months of healing. The concentrated UV rays can set back your body's natural healing process.
It’s also not a good idea to go in public pools or hot tubs because the piercing could get infected from whatever gross types of bacteria may be lurking in the water. If you really feel the need to go in a pool or hot tub while your piercing is still young, you should clean it immediately afterward.
You can still do sit-ups and other exercises when your piercing is healing as long as you don’t experience too much discomfort from the movement.
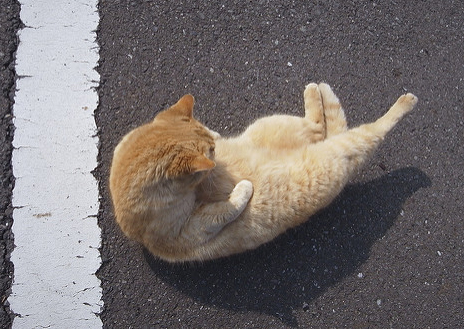
Like you, this cat is gonna get his beach body no matter what it takes. (sit-ups, used under CC 2.0)
The best way to care for the piercing is to wash it with saline solution two times a day for at least the first month of healing. You can make your own saline solution by mixing a teaspoon of sea salt with five ounces of water, or you can buy the plain saline solution that is sold at pharmacies.
Put the saline solution in a little cup. Then, press the rim of the cup against your stomach around the piercing, and lean back to completely submerge the piercing for two minutes. Afterward, take a q-tip, dip it in the solution, and gently rub it around the areas where the piercing goes through your skin.

Be sure to use sea salt to make your solution, not table salt! (Salt-(sea)_B130623, used under CC 2.0)
You may see your piercing oozing clear fluid that forms a crust around the hole. This is normal early in the healing process. There may also be some swelling, redness, and discoloration, but these issues should dissipate fairly soon after you get the piercing. Don’t clean your piercing more than the recommended two to three times a day. Excessive cleaning can cause skin irritation and dry out the area.
If it's been at least a month since the piercing and everything looks good, you can stop doing these daily cleanings. You may clean the piercing sporadically after this point if you continue to see evidence that it isn't fully healed. You should still minimize the activities listed at the beginning of this section until you reach at least the six month mark.
Potential Problems (and What to Do About Them)
In this section, I'll talk about how to spot signs of trouble with your piercing. It's important to take action on these issues immediately so you can avoid serious health consequences and permanent scarring down the road.
It's important to know what's normal and what's not. We'll cover the most important issues below.
Allergic Reaction
Sometimes, if you get the wrong type of jewelry, you can end up with a nasty allergic reaction around your piercing. Signs of an allergic reaction include:
- An itchy rash around the piercing area
- Intermittent tenderness around the piercing
If you think you may have an allergic reaction, go back to the piercer, and ask to switch your jewelry out for a different type of material. I list some suggestions for people with sensitive skin in the “choosing your jewelry” advice in the previous section.
Bacterial Infection
Infections are very common with belly button piercings because they’re in such a vulnerable area. Signs of infection include:
- Yellowish-green discharge with a foul odor
- Prolonged redness around the piercing, especially if it gets worse over time
- Skin around the piercing is hot to the touch
- You feel a burning sensation in the area
- Prolonged swelling around the piercing
- Abdominal pain (in really serious cases, the infection can become internal)
- Red lines radiating from the piercing
- Consistent acute pain (although slight bruising and occasional sharp pain from movement are normal)
Here's what an infection can look like:

See how the area around the piercing is red and swollen? This will probably also be hot and painful to the touch.
It can even look worse than this, with leaking pus around the piercing.

(Sorry, I know it's a little gross, but it's important to know what something bad looks like.)
If you think you have an infection, first of all, contrary to what you might think, you should leave the jewelry in your belly button. Taking it out could cause further complications, including the formation of abscesses in the area. Use the same cleaning procedure detailed in the previous section, but soak the piercing for ten minutes in the saline solution. You may be able to rub a small bit of antibacterial cream around the piercing to soothe the infection, but use it sparingly.
If the infection doesn’t go away within a week or two, go to a doctor to check if you need to take more drastic measures to prevent it from developing further (i.e. taking oral antibiotics). You may need to return to the piercer to get the jewelry taken out if the infection has become too severe.
Lean on the side of cautious - it's always better to get something checked out and have nothing wrong, than to try to tough it out and make a problem worse.
Migration and Rejection
Another issue that is common with belly button piercings is migration and rejection of the jewelry. Signs of migration and rejection include:
- You can see way more of the barbell than you could when it was initially pierced (because it’s getting pushed out of your body)
- Noticeable movement of the holes of the piercing marked by a trail of redness
- Redness and scarring in the area
- Hole appears larger than it was initially
- The skin between the holes is translucent and thin
If you notice this happening to your piercing, you will have to go to your piercer to get the jewelry removed, let everything heal, and eventually try piercing it again. There’s no way to fix the issue without taking out the piercing and starting over.
Migration and rejection don’t mean the piercing is infected, so they aren’t overall health risks, but they come with more aesthetic problems when they’re not addressed. Piercings that the body rejects but that are not removed promptly often cause serious scarring.
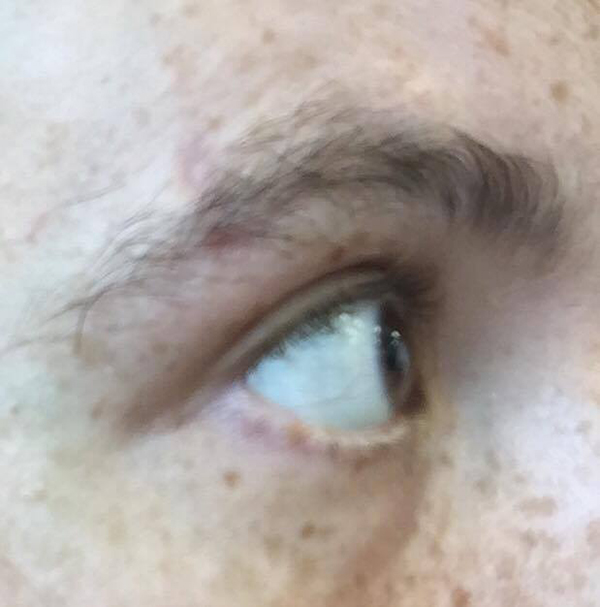
Rejection happens with a lot of body piercings. You can faintly see the rejection scar from my eyebrow piercing in this picture (I waited too long to take it out because I liked it so much). (Sam Lindsay/All rights reserved.)
How Do You Know When You’re Done Healing?
As mentioned above, it takes around six months to a year for a belly button piercing to heal to the point where you can take it out and change it. If you reach the six to nine month mark and aren’t experiencing any of the issues detailed in the previous section, you can check the piercing to see if it’s fully healed.
Wash your hands, and try sliding it back and forth a bit to make sure it moves freely without pain. If everything feels and looks good, I’d recommend going back to your piercer so they can verify that you’re completely healed. They will be able to take out the piercing and replace the jewelry for you.
If you change your piercing on your own, be sure to sanitize both the new jewelry and the piercing site before insertion. Infections are a risk even in piercings that are essentially completely healed, so don’t lose all respect for hygiene after months of vigilance.
Summary: Key Tips for Getting a Belly Button Piercing
Here's a quick rundown of most important things to remember when getting a belly button piercing. Before you get pierced, you should:
- Check to make sure your belly button is a good candidate for piercing
- Understand the risks involved and be willing to take on the responsibility of keeping the piercing clean
- Be aware of the laws for your state (may entail asking your mom or dad to go with you)
- Find a reputable piercer
When you're at the piercing studio, you will need to:
- Choose jewelry that is least likely to irritate your skin
- Verify that everything appears sterile and professional in the piercing room
- Be prepared to endure a bit of pain (about the same as getting your ear lobe pierced)
- Pay (and tip) the piercer
After you get your belly button pierced, you should:
- Never touch it without washing your hands first
- Clean it two to three times a day with saline solution for at least the first month
- Avoid tight clothing around your midsection, tanning beds, hot tubs, public pools, and sleeping on your stomach until the piercing is at least mostly healed
- Monitor the piercing site to make sure there are no issues with allergic reactions, infections, or rejection of the jewelry
- Don't change your jewelry until six to twelve months into the healing process when you can slide the jewelry back and forth without pain or resistance
If you have more questions about any specific problems you're experiencing with your piercing, you should talk to your piercer to get an expert's opinion. Otherwise, just continue to enjoy your awesome new belly bling!